Impersonation
Impersonation allows administrators to log in as another user.
Impersonation and Token Exchange Flow in TUMApply
In TUMApply, impersonation is used when the server receives a user's email and verified OTP but needs to obtain a valid Keycloak access token on behalf of that user. This process allows seamless authentication without exposing the Keycloak UI to the user.
The flow proceeds as follows:
- The user submits their email and OTP to the TUMApply server.
- The server verifies the OTP against its database.
- After verification, the server calls the Keycloak
/protocol/openid-connect/tokenendpoint using thetumapply-admin-apiclient credentials. - The request uses
grant_type=urn:ietf:params:oauth:grant-type:token-exchange, the clientId as audience and includes therequested_subjectparameter, which is the user ID or username of the user to be impersonated. - Keycloak returns a valid access token and refresh token for the impersonated user.
- The server returns this token to the client, allowing the user to proceed seamlessly without any Keycloak UI interaction.
This approach requires enabling the token-exchange and admin-fine-grained-authz:v1 features in Keycloak. Newer
versions of Keycloak (post-26.3.1) have deprecated full impersonation support without legacy token exchange enabled.
Manual Steps to Enable Impersonation
To manually enable impersonation in Keycloak for TUMApply, follow these steps:
The UI and texts can differ between versions. This is the approach for version 26.3.1.
-
Enable Required Features:
- Start Keycloak with the following features enabled (add this to your Docker command or Keycloak startup configuration):
--features=token-exchange,admin-fine-grained-authz:v1 -
Enable User Permissions:
- In the Keycloak Admin Console, go to Users.
- Navigate to the Permissions tab.
- Click Enable Permissions.
-
Add Impersonation Permission:
- In the same Permissions section, click on user-impersonated.
-
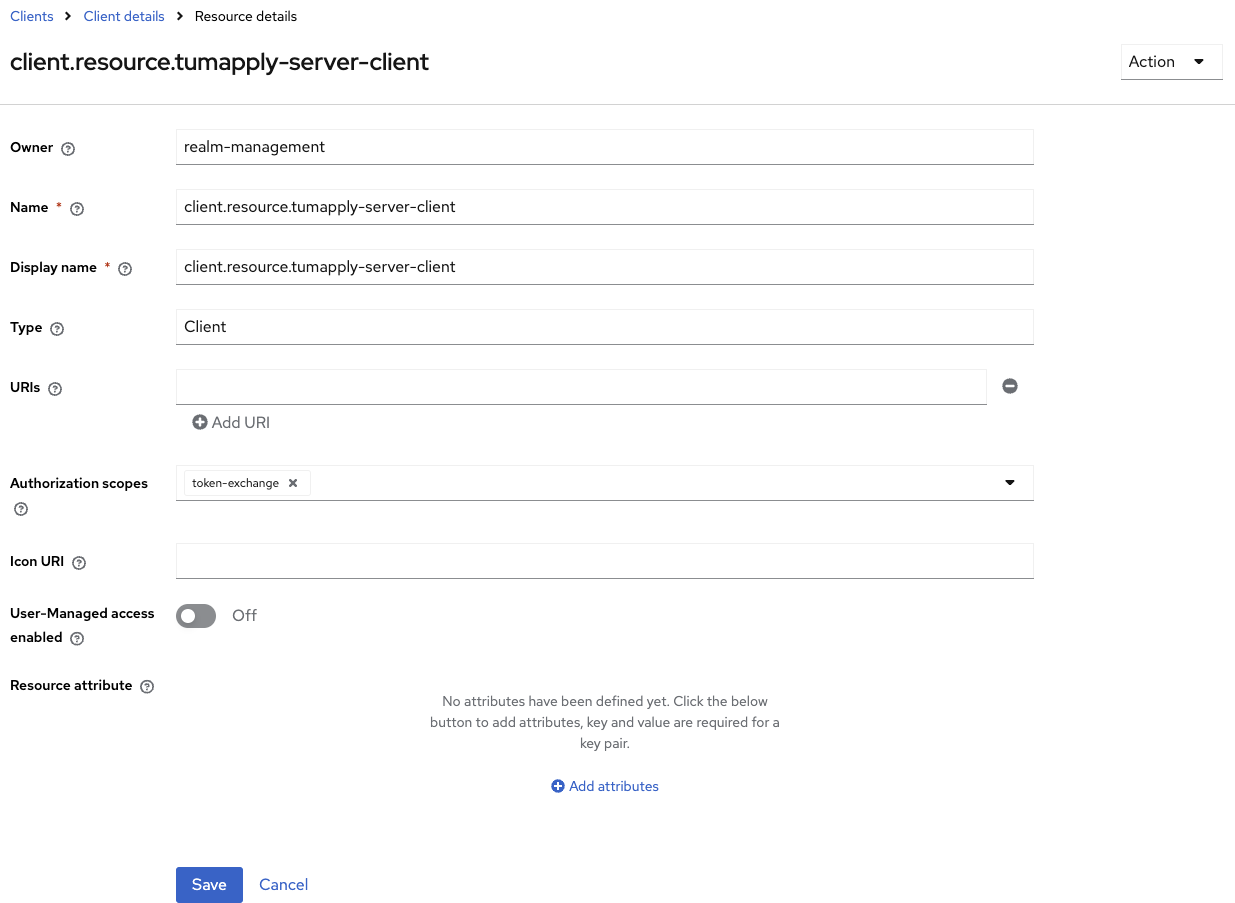
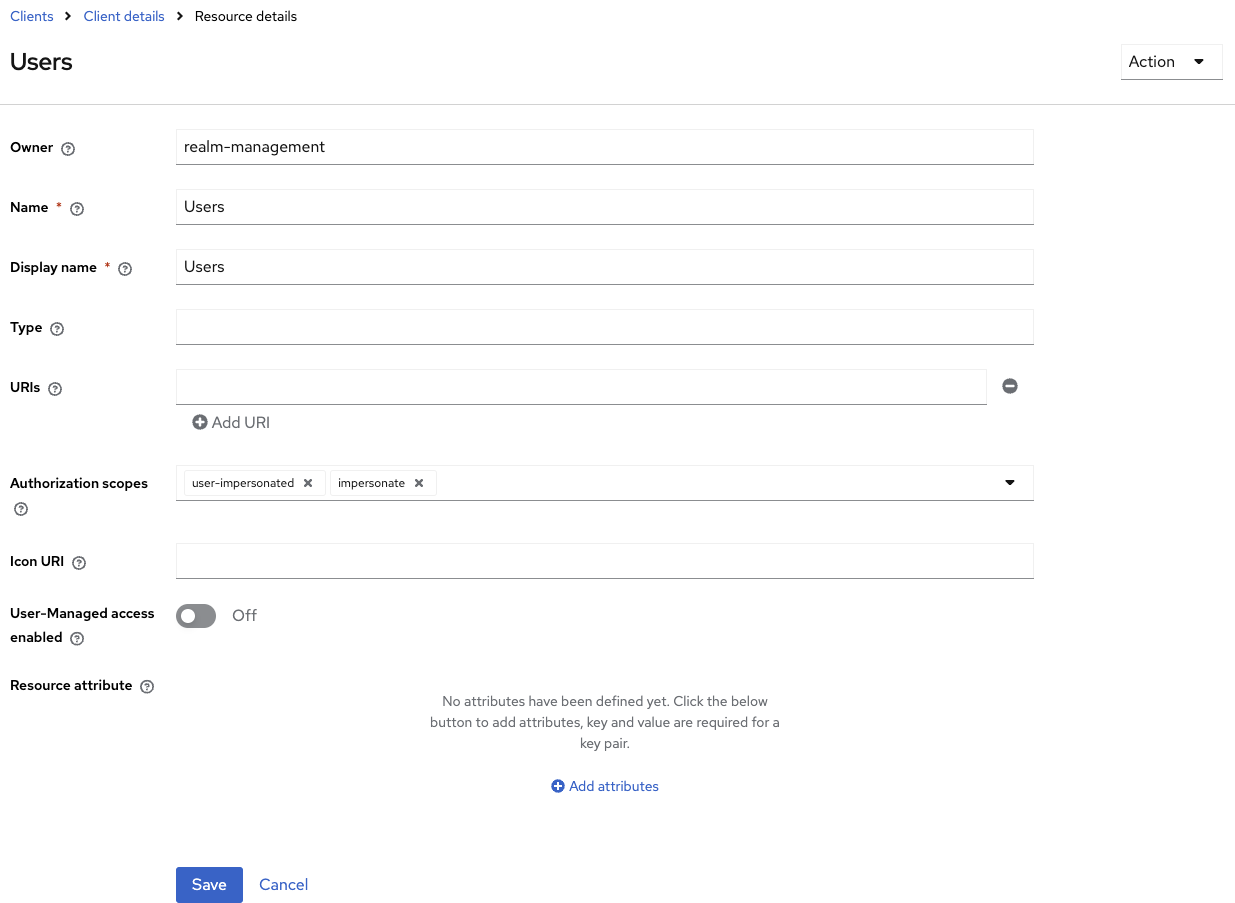
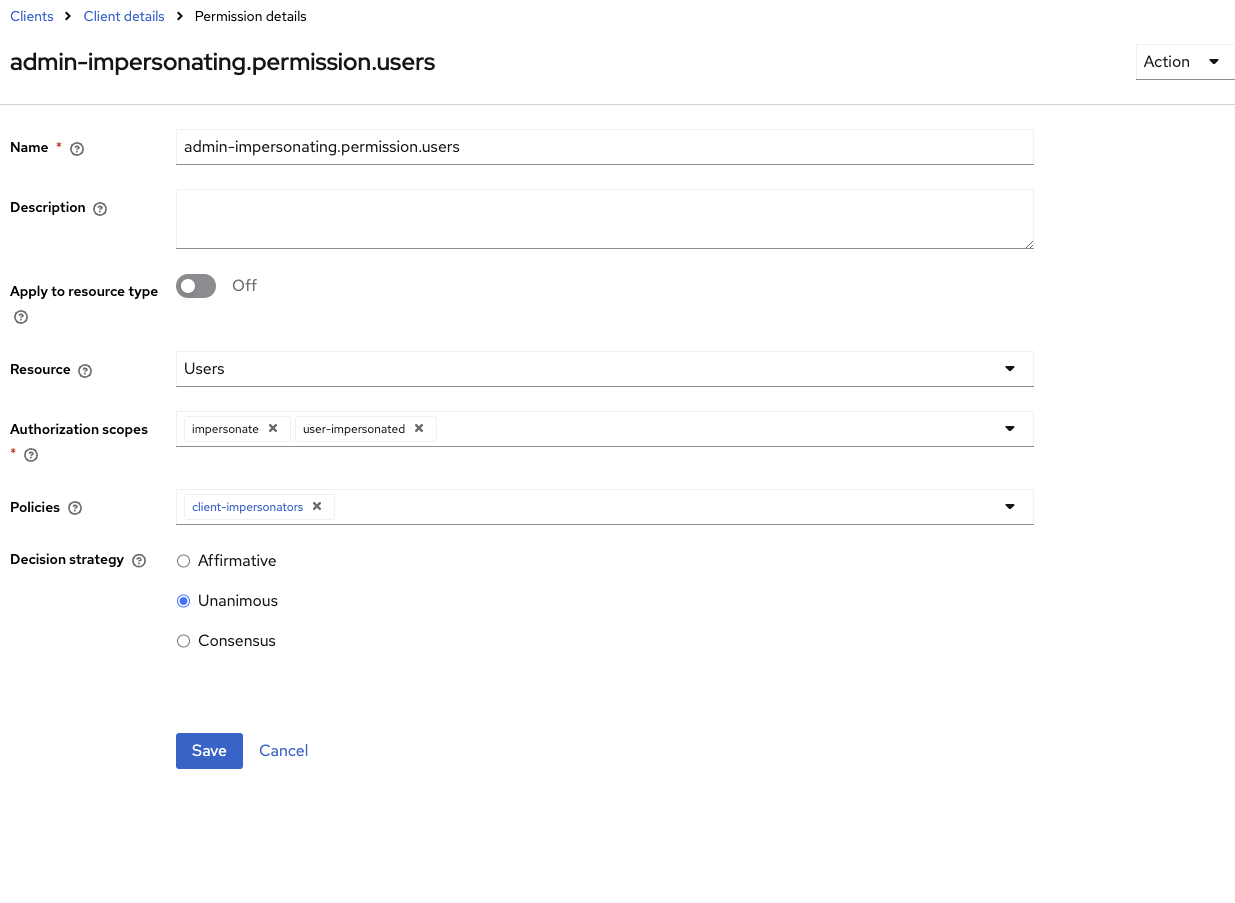
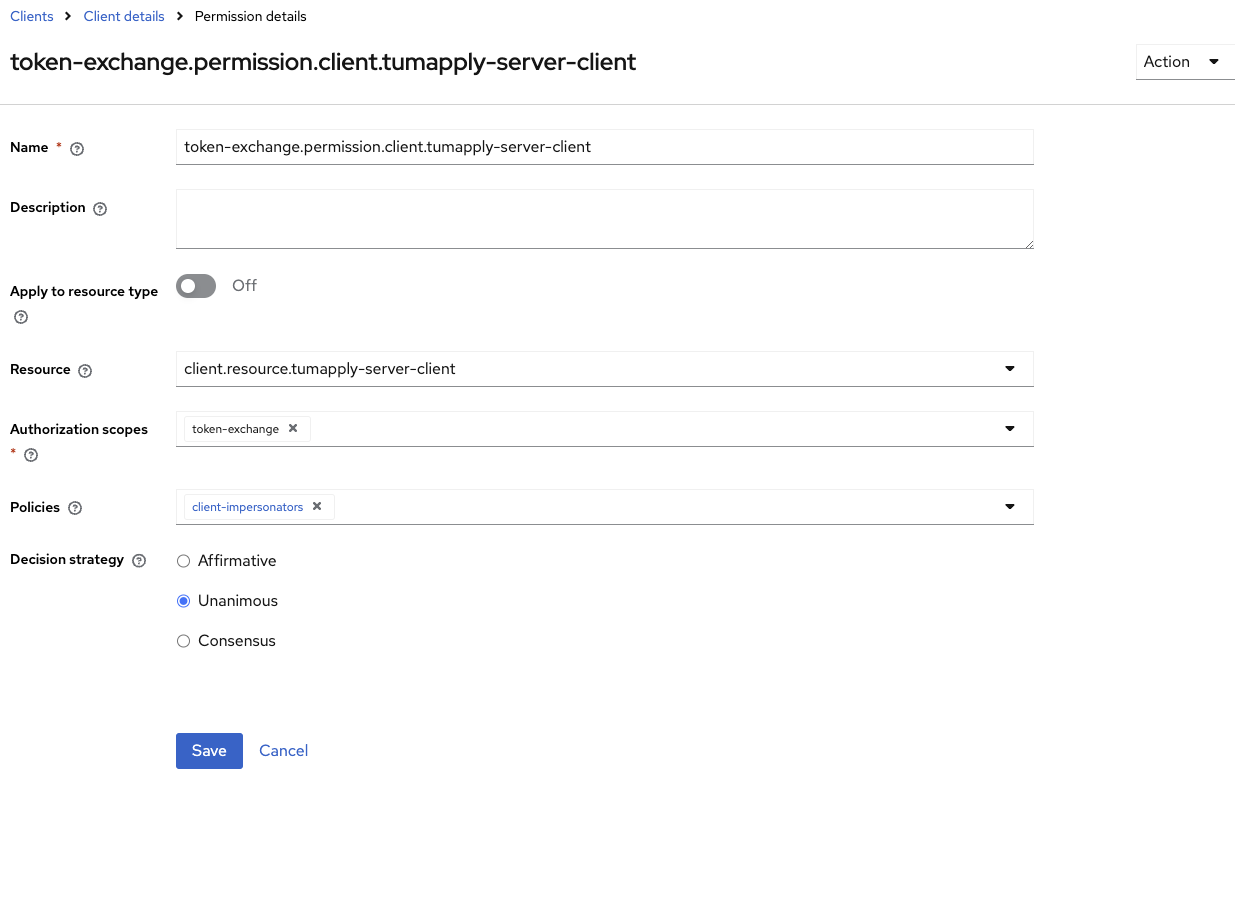
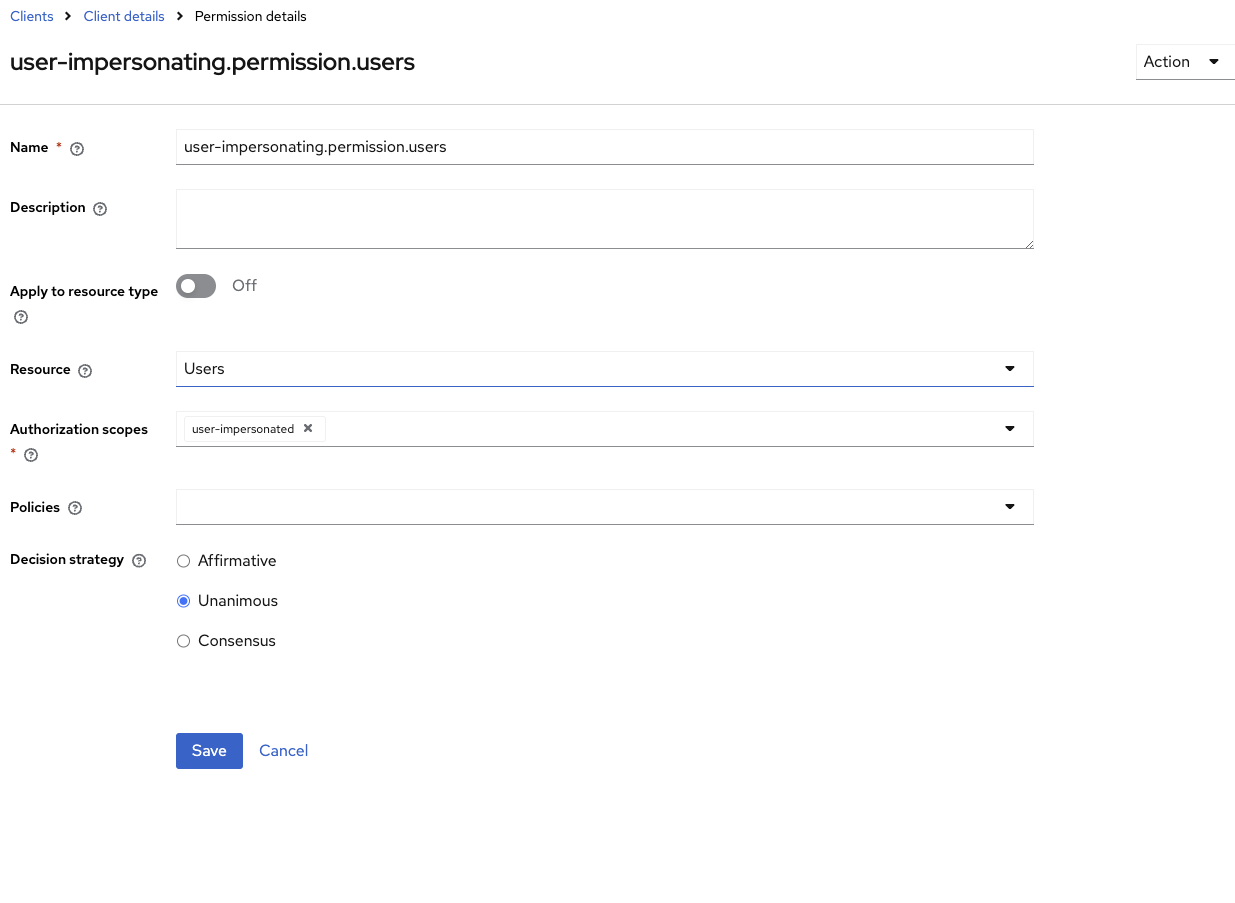
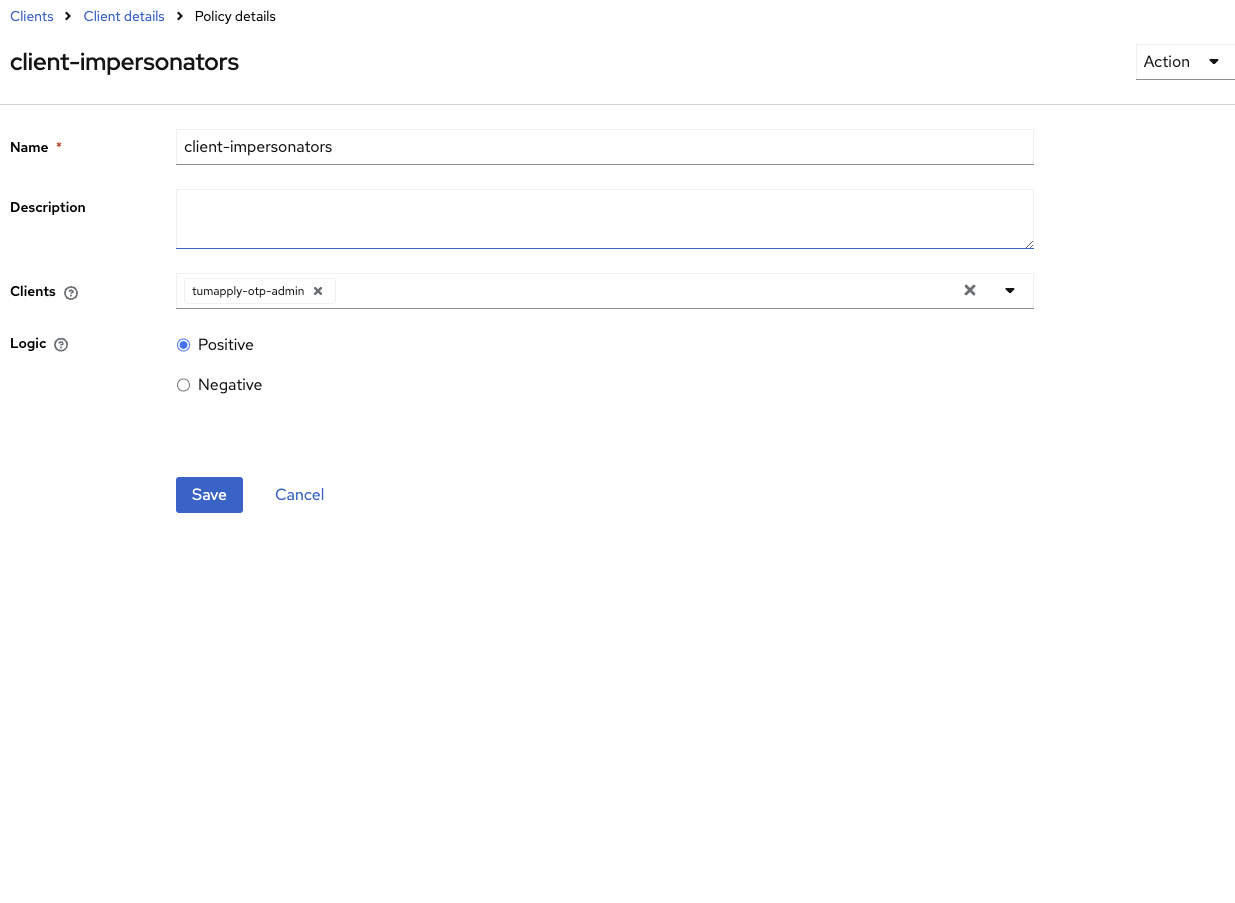
Configure Authorization in realm-management Client:
- Go to Clients → realm-management → Authorization.
- Add or verify the necessary resources, policies, and scope-based permissions as shown in the pictures below.
-
Test the Impersonation Flow:
- Use the
/protocol/openid-connect/tokenendpoint with thegrant_type=urn:ietf:params:oauth:grant-type:token-exchangeand therequested_subjectparameter to verify that impersonation works as expected.
- Use the
Resources
Permissions
Policy
References
Version Compatibility Notice
Impersonation currently only works correctly in Keycloak v26.3.1 or earlier, because version 26.2.0 and higher have
changed the client role and authorization model. The current configuration enables the token-exchange and
admin-fine-grained-authz:v1 features to maintain impersonation functionality. Once Keycloak officially reintroduces
support for impersonation, this setup can be updated accordingly. For the latest details, refer to the official
documentation: Keycloak Release Notes.
Security Notes
- Restrict impersonation to admins
- Monitor impersonation events in Keycloak logs
- Never use impersonation accounts in automated tests or CI
Troubleshooting
- Ensure you are using Keycloak version v26.3.1 or earlier for reliable impersonation support.
- Verify that the
token-exchangeandadmin-fine-grained-authz:v1features are active.
Technical Summary
This impersonation setup uses the older fine-grained authorization model intentionally for compatibility with Keycloak versions up to v26.3.1. It relies on legacy token exchange features to enable impersonation functionality that newer Keycloak versions have changed or deprecated. It is recommended to migrate this configuration once Keycloak fully supports impersonation under the new authorization and client roles model to ensure future compatibility and security improvements.